Difference between revisions of "Cloud Connection"
Jump to navigation
Jump to search


| Line 9: | Line 9: | ||
[[File:Docker Repository.png|center|frame]] | [[File:Docker Repository.png|center|frame]] | ||
* Deploy the image by giving it a '''name''' and selecting '''auto-restart'''. | * Deploy the image by giving it a '''name''' and selecting '''auto-restart''' and click '''Next'''. | ||
[[File:Container name.png|center|frame]] | [[File:Container name.png|center|frame]] | ||
| Line 20: | Line 20: | ||
*Add two new '''Environment''' variables '''MINIO_ROOT_USER''' and '''MINIO_ROOT_PASSWORD''' to set the <code>root</code> user credentials. NOTE: The password and username will be logged, you should generate a long random string for this ([https://min.io/docs/minio/linux/administration/identity-access-management/minio-user-management.html#minio-root-user further reading]) | *Add two new '''Environment''' variables '''MINIO_ROOT_USER''' and '''MINIO_ROOT_PASSWORD''' to set the <code>root</code> user credentials. NOTE: The password and username will be logged, you should generate a long random string for this ([https://min.io/docs/minio/linux/administration/identity-access-management/minio-user-management.html#minio-root-user further reading]) | ||
[[File:Container-env.png|center|frame]] | [[File:Container-env.png|center|frame]] | ||
*You ''have'' to have the ''' | *You ''have'' to have the '''Execution Command''' configured to actually get it to run the Minio server. Otherwise the container just exists. Set the execution command to: <code>minio server /data --console-address ":9090"</code> | ||
* | [[File:Container-exec.png|center|frame]] | ||
* You now have a MinIO S3 server. Verify it is running by selecting '''Container''' and checking the status. | *That was all of the required settings. Your '''Summary''' page should look like this. | ||
[[File:Container-summary.png|center|frame]] | |||
*You now have a MinIO S3 server. Verify it is running by selecting '''Container''' and checking the status. | |||
=== Creating a Bucket === | === Creating a Bucket === | ||
* Open a Browser and type in your '''NAS IP''' along with '''9090''' as the port (e.g. <code>192.168.0.30:9090</code>) to access the Minio Object Store web page. | |||
[[File:Minio-server.png|center|frame]] | |||
* Enter the configured '''username''' and '''password''' to access the Object Store web page. | |||
[[File:Minio-overview.png|center|frame]] | |||
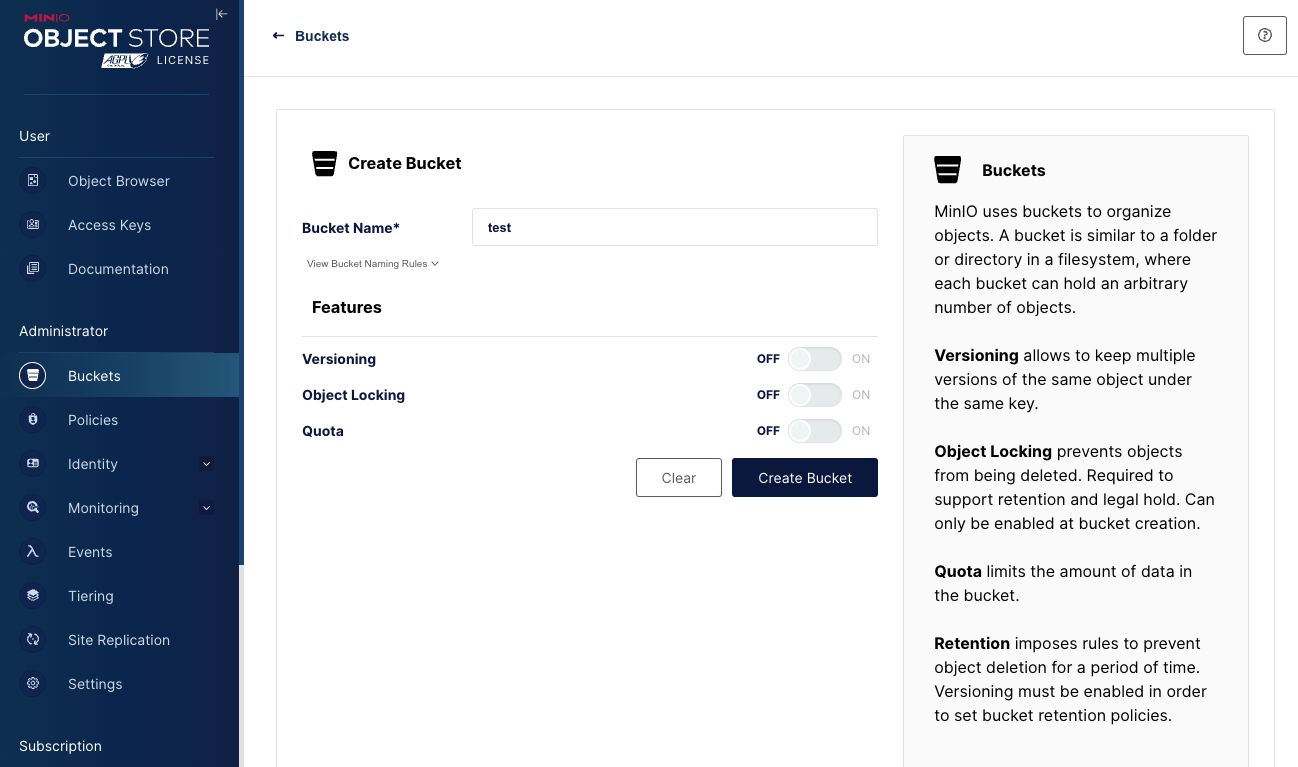
* Choose '''Create a Bucket''' and enter the desired bucket name and click '''Create Bucket'''. | |||
[[File:Minio-bucket.png|center|frame]] | |||
Revision as of 21:31, 15 November 2023
Set Up an S3 Server on Synology NAS
Installing Container Manager and MinIO Server
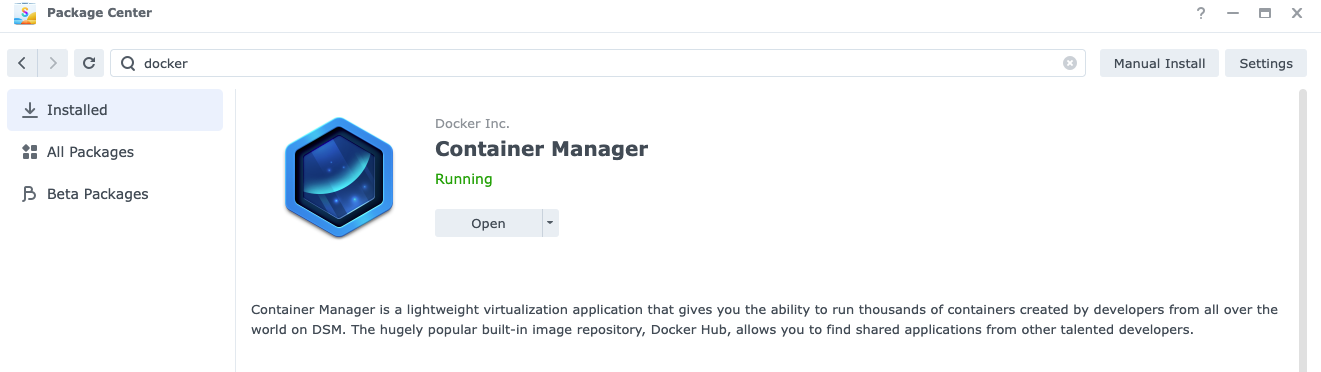
- See list of Synology Applied Models for Container Manager (Docker). If your model is supported navigate to the Package Center and install Container Manager (Docker) app.

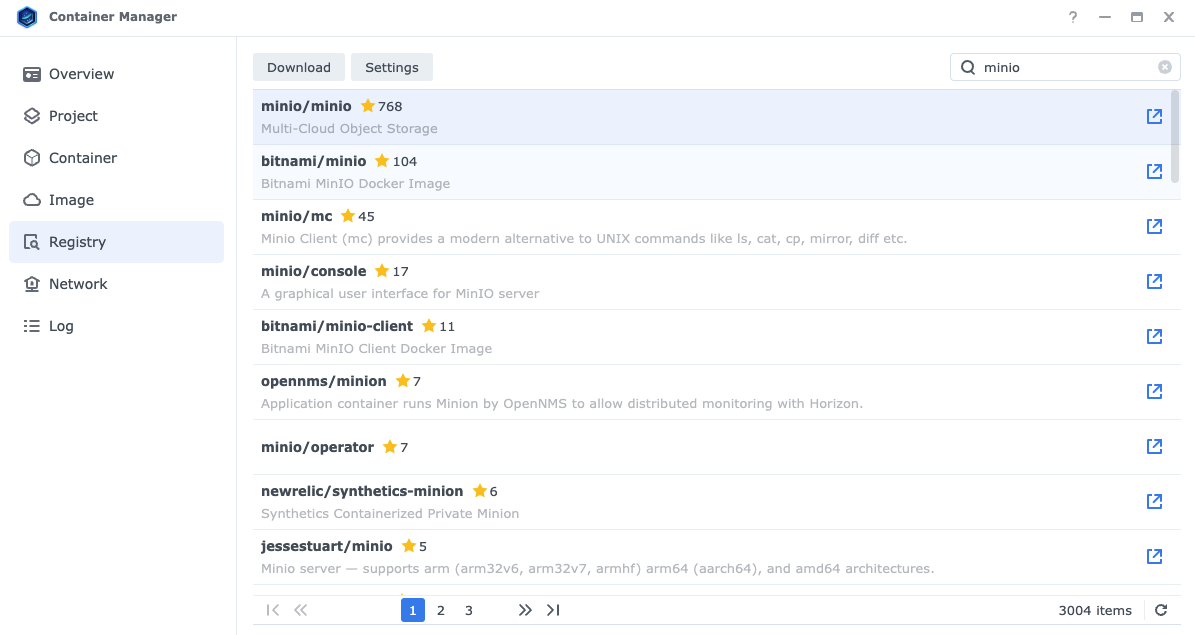
- Open the Container Manager app and navigate to Registry. Search for
minioand select minio/minio. Double click minio/minio and choose the latest build and download container image.

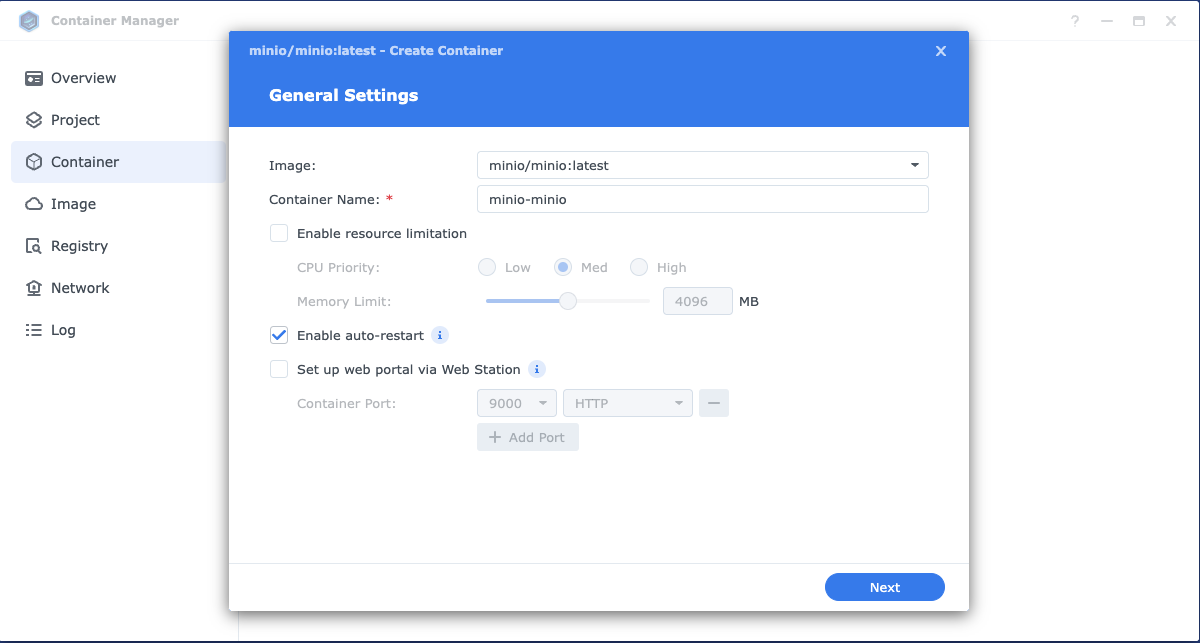
- Deploy the image by giving it a name and selecting auto-restart and click Next.

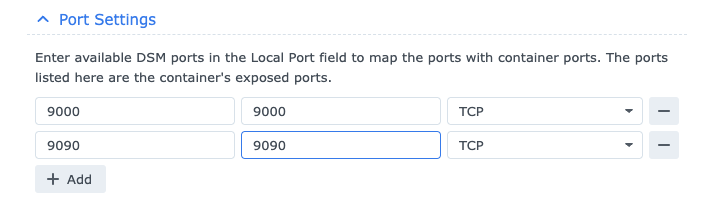
- The container will use both ports 9000 and 9090 (TCP). Define that under Port Settings.

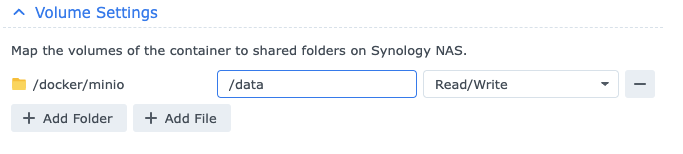
- Create a folder with some name in the
/dockershared folder, or your own/minioroot shared folder and mount that under Volume Settings as/data

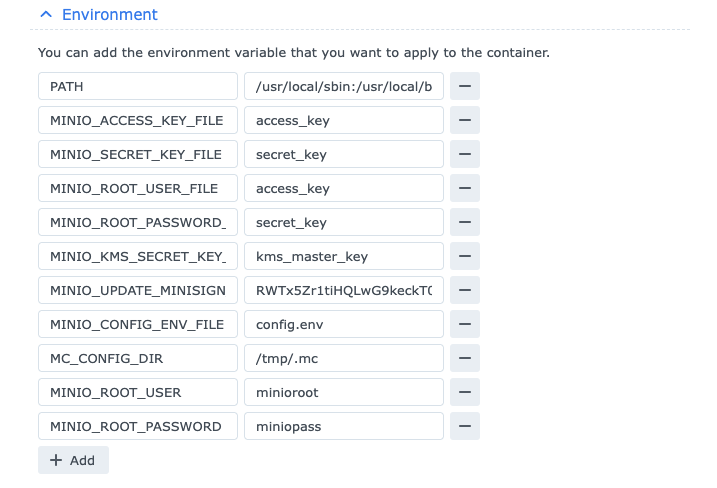
- Add two new Environment variables MINIO_ROOT_USER and MINIO_ROOT_PASSWORD to set the
rootuser credentials. NOTE: The password and username will be logged, you should generate a long random string for this (further reading)

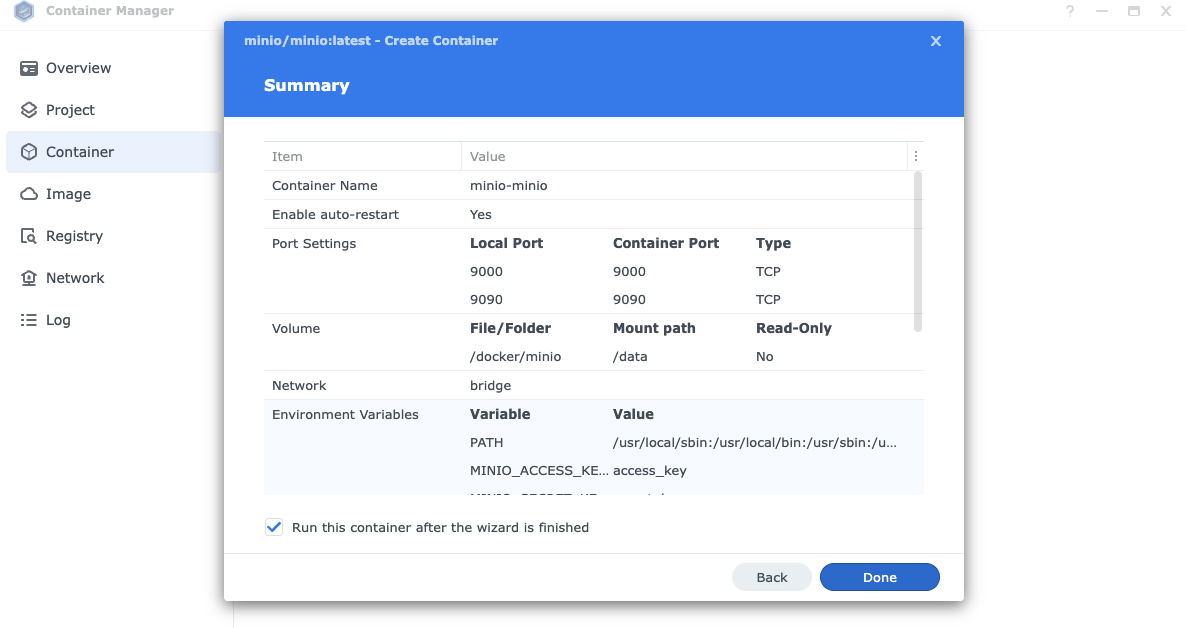
- You have to have the Execution Command configured to actually get it to run the Minio server. Otherwise the container just exists. Set the execution command to:
minio server /data --console-address ":9090"

- That was all of the required settings. Your Summary page should look like this.

- You now have a MinIO S3 server. Verify it is running by selecting Container and checking the status.
Creating a Bucket
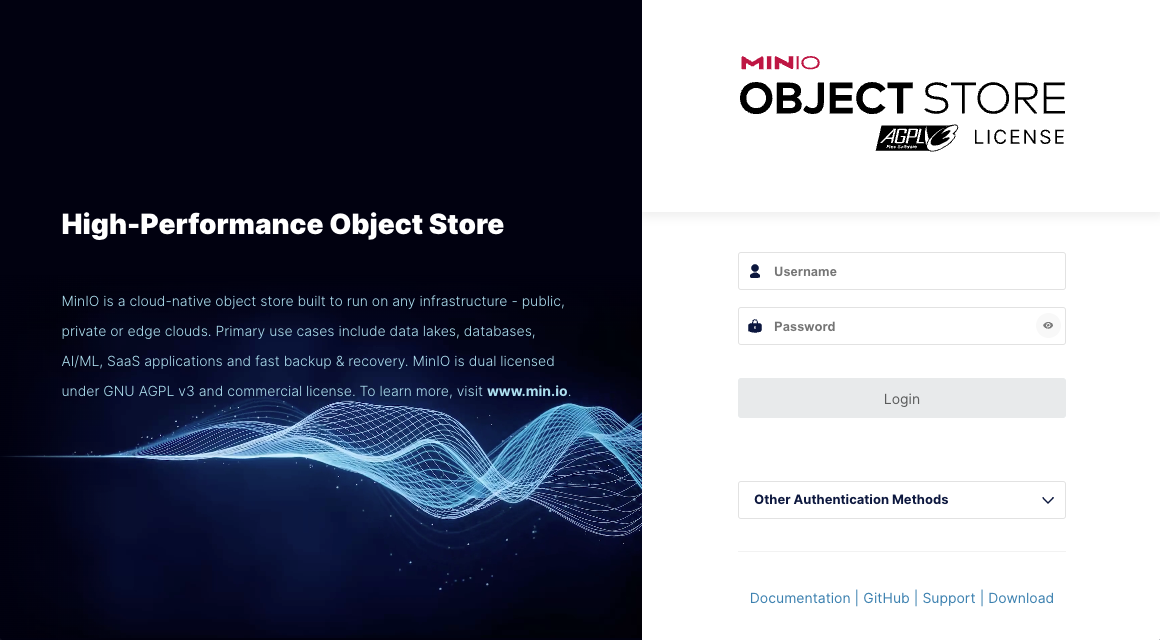
- Open a Browser and type in your NAS IP along with 9090 as the port (e.g.
192.168.0.30:9090) to access the Minio Object Store web page.

- Enter the configured username and password to access the Object Store web page.

- Choose Create a Bucket and enter the desired bucket name and click Create Bucket.
