Set Up an Azure File Share
Follow these steps in order to use the Azure File Share in Fine applications:
Make sure you have a Microsoft Azure account and login into the Azure portal
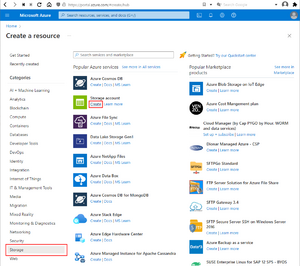
Create a new "Storage account" resource
Select "Create a new Storage account":
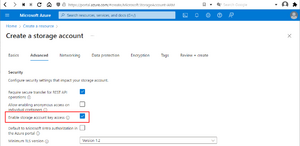
On the "Advanced" tab make sure the option "Enable storage account key access" is checked:
Setup other properties to match your needs.
On the Storage account page, select "File shares" and "+ File share":
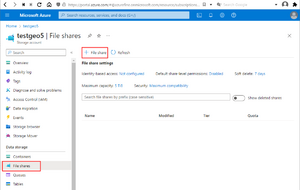
Setup the properties of the file share to match your needs.
Fine applications use the "Shared access signature" (SAS) to login into the Azure file share. Still on the Storage account page, select "Shared access signature":
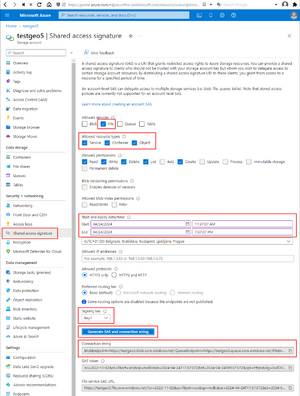
Check "File" within allowed services and all Allowed resource types. Make sure you setup a reasonable expiration date/time.
Click on "Generate SAS and connection string" to generate the "Connection string".
Copy "Connection string", paste it into the "New Azure File Share account" dialog and select the share you want to use with the drop-down button:

Now, you can use the Azure file share to save, load and transfer your Fine documents.
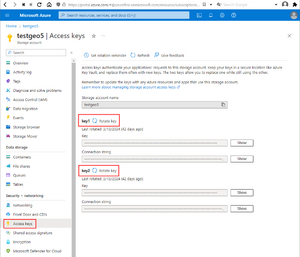
If you need to remove access to the file share (e.g. because a co-worker left your company), you have to invalidate the access key you used when generating the SAS.
Go to the "Access keys" tab and click on "Rotate key" at either key1 or key2 depending what key you used to generate the SAS:
Now all the SASs will be invalidated and the users won't be able to access the file share anymore. You will have to create a new SAS to access the share.
